
How I Got The Shot - Blue Moon
In this post I go through how I got the shot below of the Blue Moon Easter weekend in Virginia.

To get a really detailed shot of the full moon, quite a few things are needed. You have to have a camera with manual setting capabilities and a really long lens at a minimum. Most people use a 100-400mm lens, but that still doesn’t have the reach needed to get good detail. You will have to crop in too much and lose a lot of quality in doing so.
“Can’t I use an extender and basically double my lens length?” You say. Yes, you certainly can, and you will effectively go from 400mm to 800mm, but you have drawbacks in doing so. The first is quality. The 800mm that you are getting with you 2x extender is nowhere near the quality that you’d get by having a dedicated 800mm lens. You lose sharpness when you extend, which is fine for a lot of situations, but the moon has a great deal of detail. The second issue is aperture. When you use an extender not only are you doubling the length of lens, but cutting in half the amount of light coming into the lens. You 400mm f5.6 is now a 800mm f11.2. Ouch. Depending on the camera you now have to boost your ISO to compensate and that will give you noise.
So so how did I get this shot? With a gigantic lens of 1100mm, which is my Meade ETX telescope.
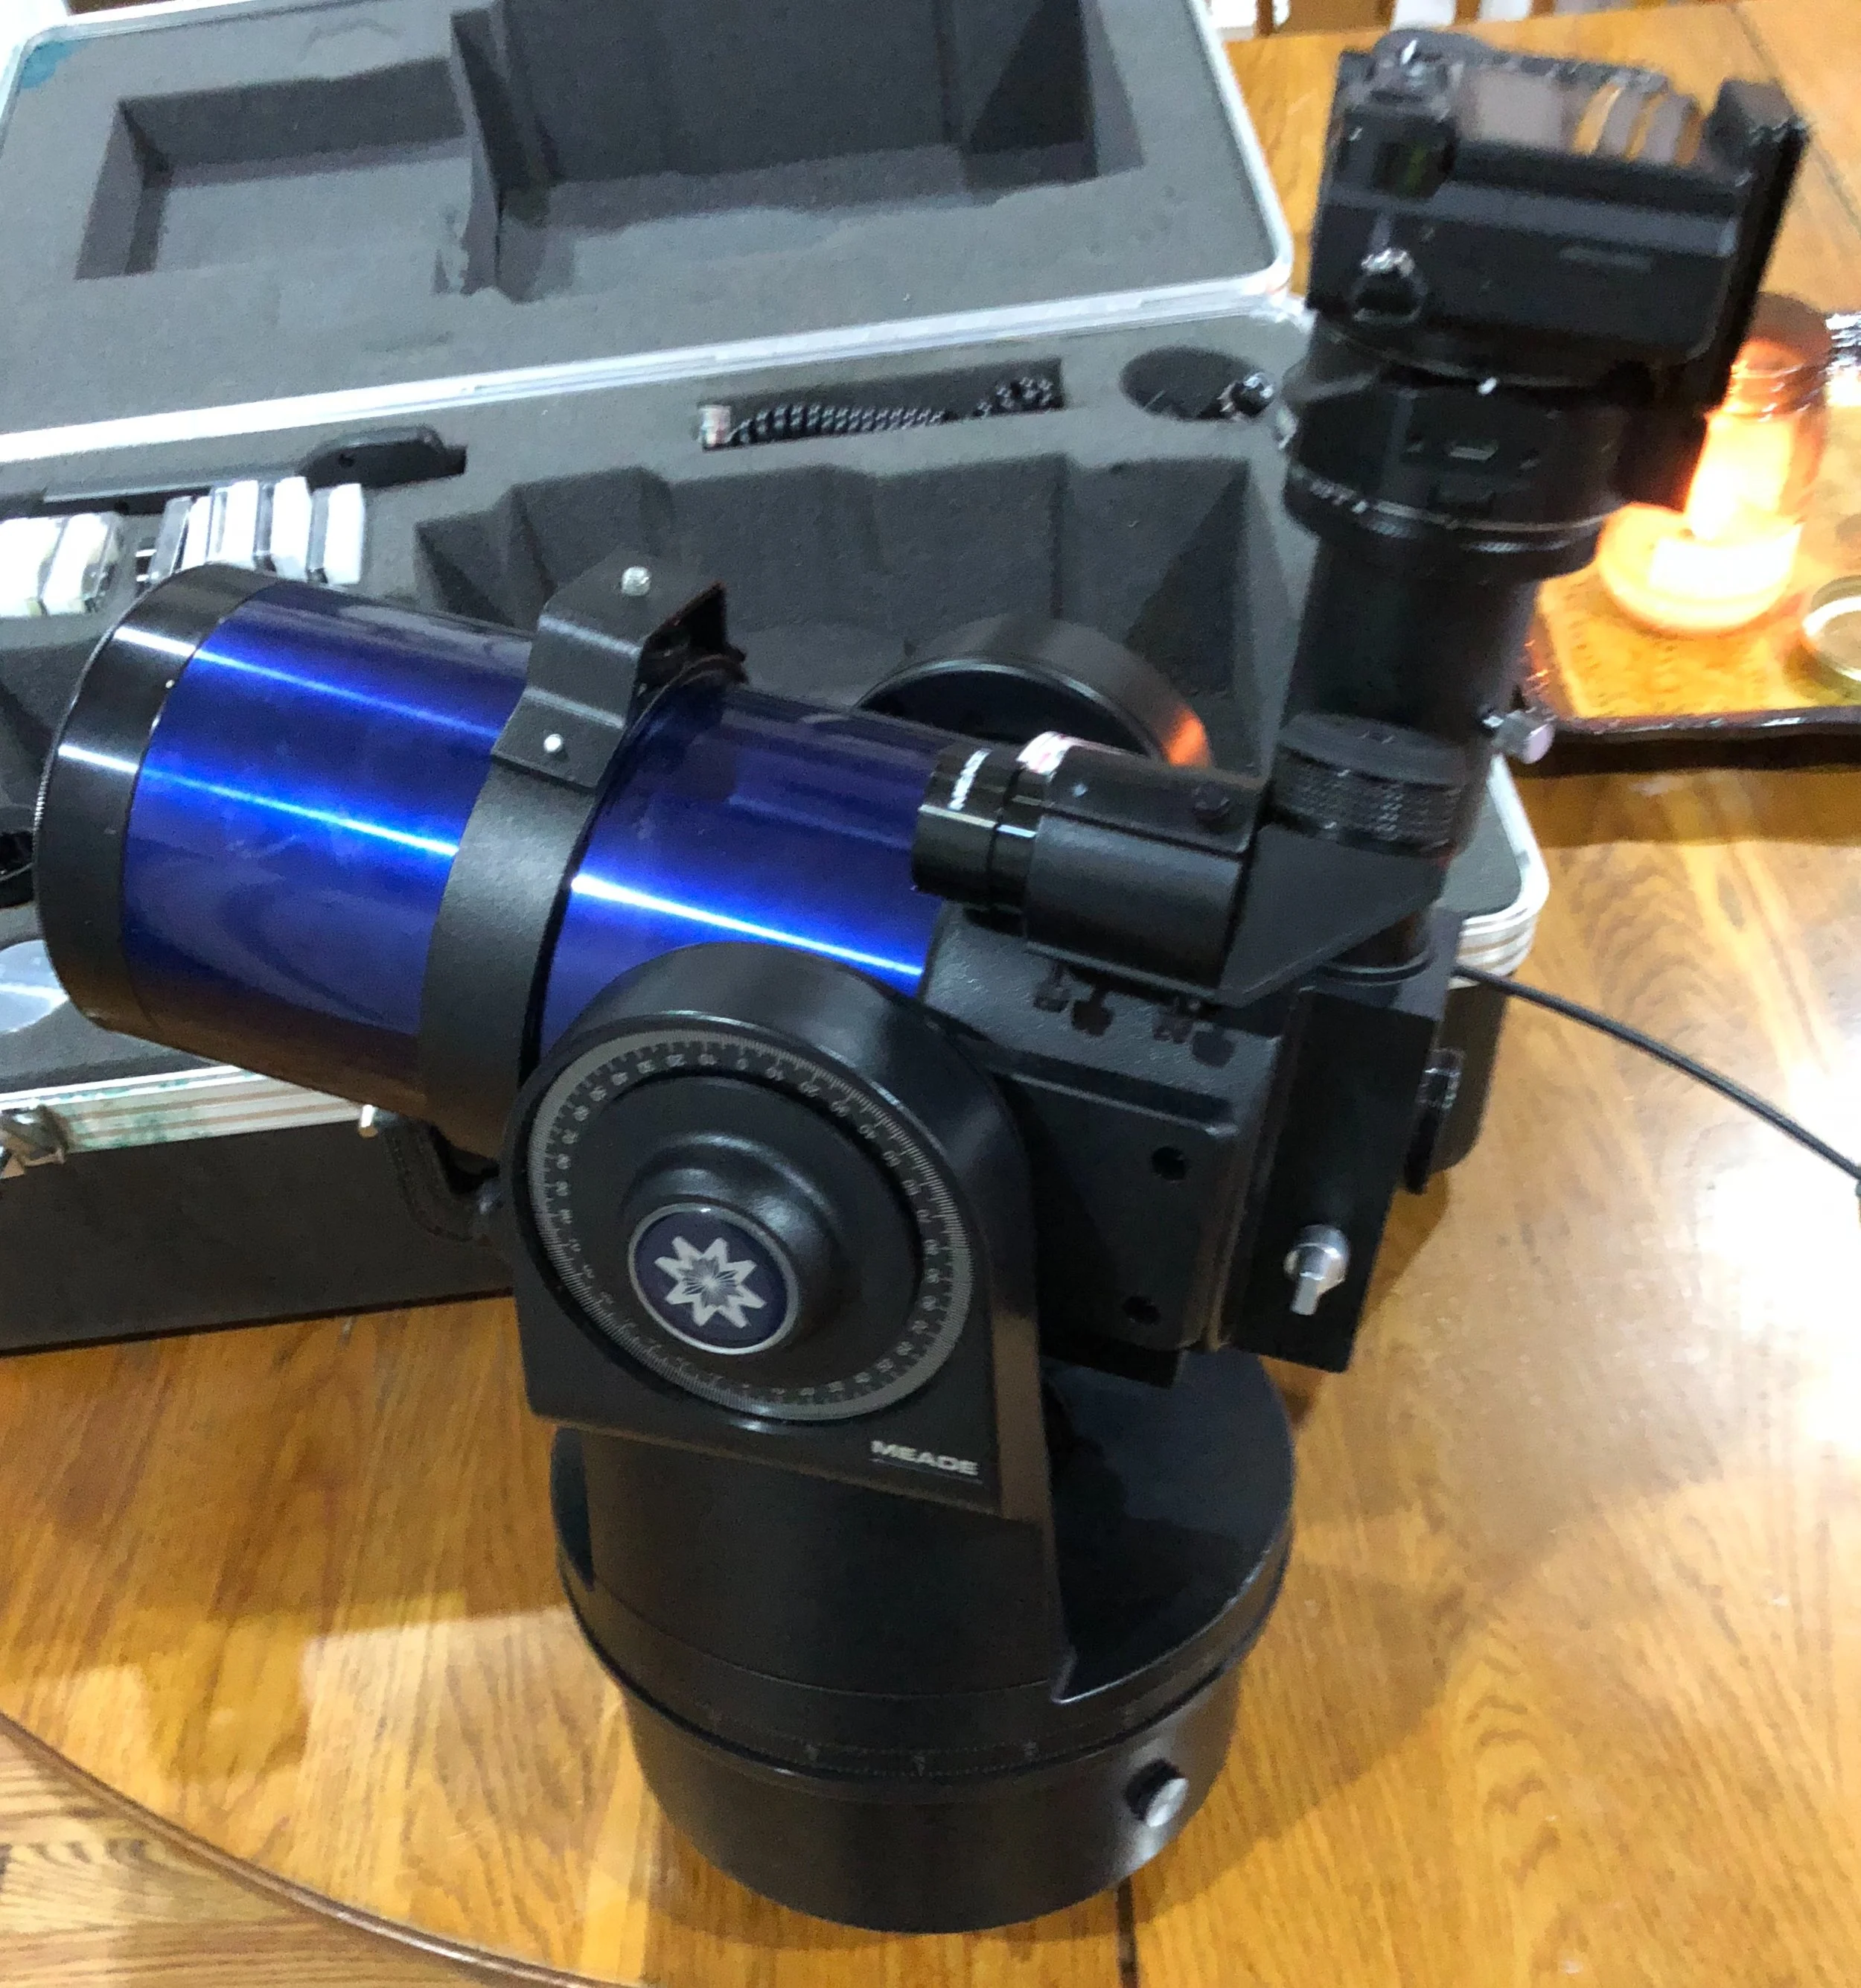
I have a handy dandy eyepiece projection adapter allowing me to set my Sony A6300 up to use my telescope as a lens. I do still have a small aperture, but it is fine for this task.
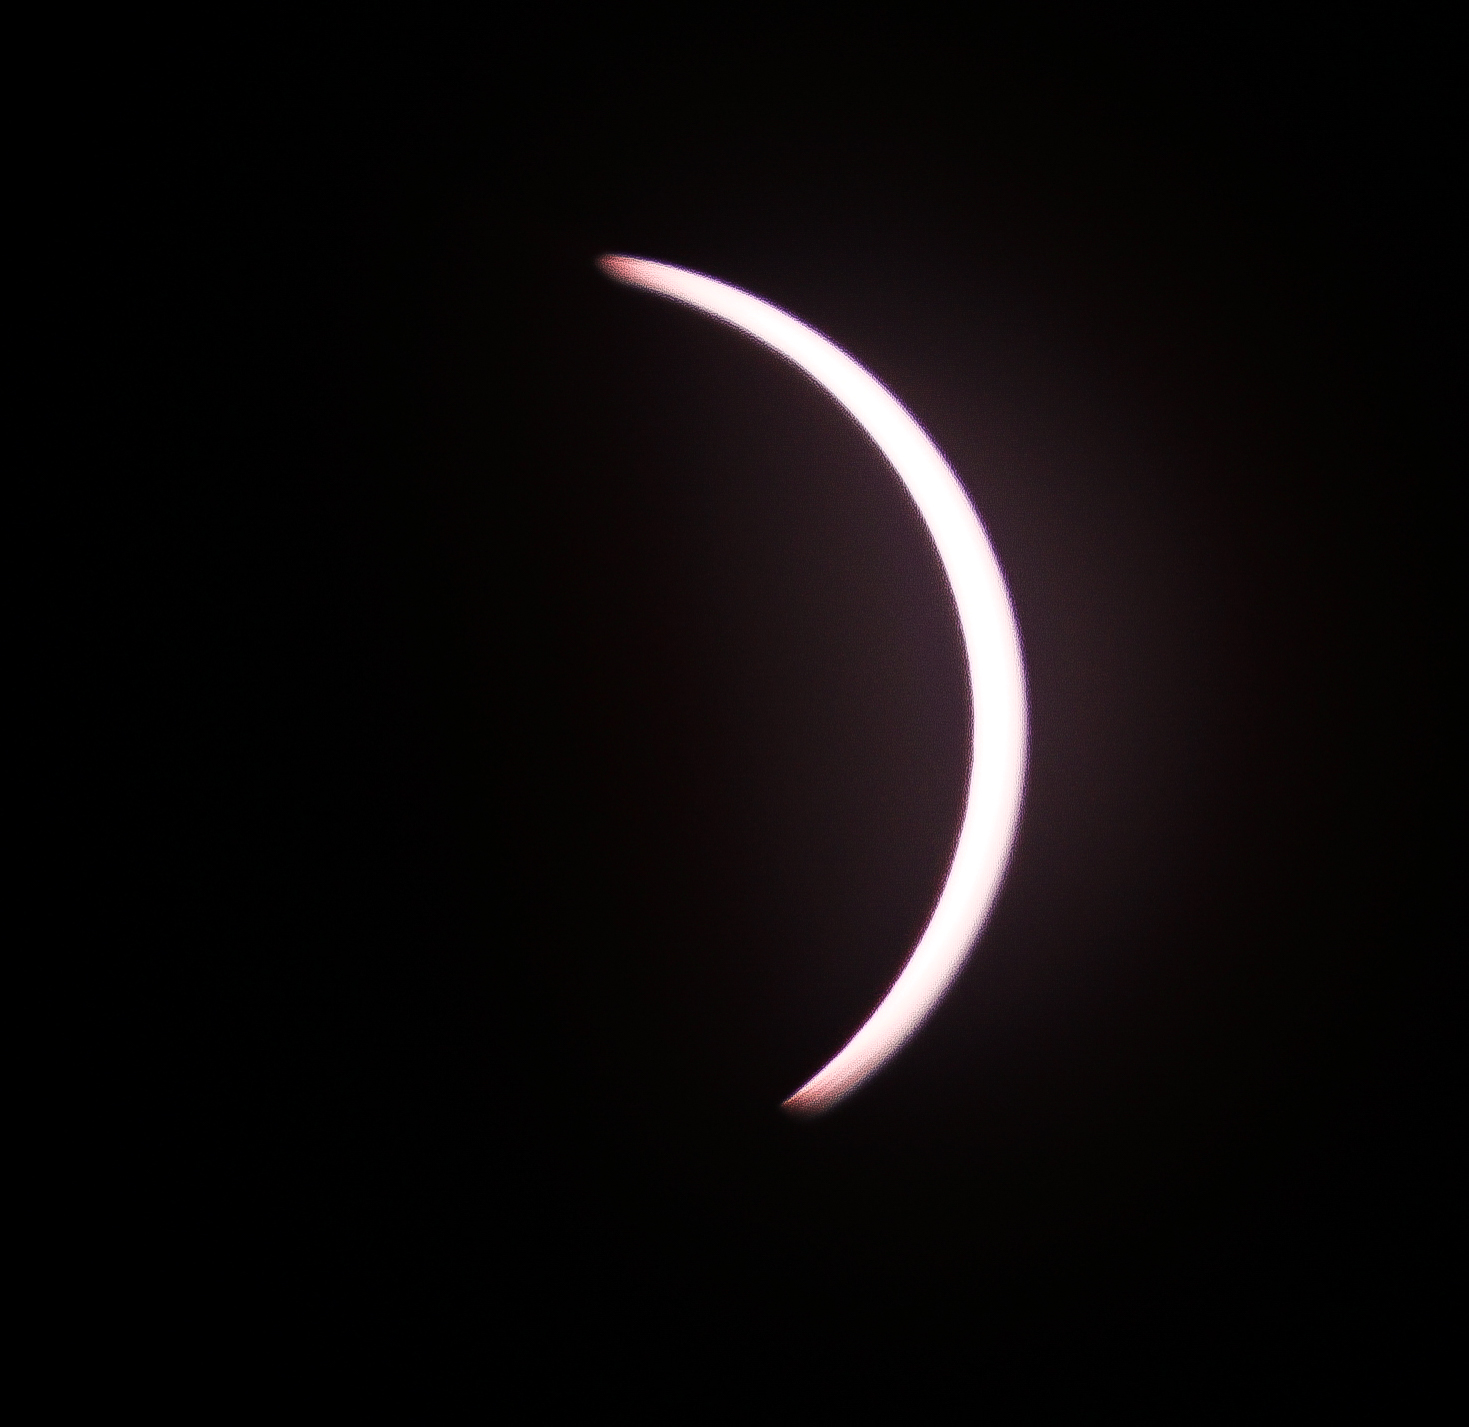
‘So do I just go out, plop my telescope on its tripod and shoot away? Not really. The earth spins about 25,000 mph (if I remember correctly). That is fast and you see it when you are using a lens that big on a tripod. To stop the action, I needed to increase shutter speed.
‘My settings here with the telescope as the lens as 500 as my shutter speed and ISO2600. But I had 1 more problem, the lens was too large as the moon would not fit in frame. 😊 Okay, then how did I get this shot? I took 2 shots and merged them into 1 in Photoshop.
Well that’s how I got the shot. Hope that answered a question or two. I’m setting up some moon workshops right now, so come out and shoot with me. As always, feel free to ask questions on Twitter or Facebook, and please follow me on each.
Have fun!

Busy Weekend of Classes, Workshops and Photo Exhibitions
Hello everyone, thanks for following along.
It's Monday evening and one of my busiest weekends of the year is quickly approaching. I'm so excited for my very first photography showing/exhibition this Saturday from 4-8pm at the Warren County Community Center in Front Royal, VA.
This showing will showcase over 50 of my images throughout the years. Some of our favorites, varying on subjects. All will be for sale, and there will be some of the largest acrylics all the way down to the smaller print only variations. I'll be there to talk about the photos, how I got them, what I was thinking and sign your print if you like. Please stop by and let me show you my work. Oh, we'll be doing some Facebook Lives and giveaways there too!!!

Saturday morning we'll be up bright and early for a sunrise photography workshop in the Shenandoah National Park. Weather is looking promising and I have a couple of spots available.

10am brings my first class of the day, Photo 101. Spots are still available. This class is my first in series and I teach lighting and composition. It's great for anyone with any type of camera, even phones. Coming out of there you will instantly be taking better photos and seeing what you can do better.
Mid day is my most popular class, Photo 201. This is the big one, getting off of automatic mode and learning how to use those manual settings on your camera. It's all about aperture, shutter speed and ISO, and I'll have you putting them all together in no time. You definitely need a camera with manual setting options. Spots still available.
It's going to be a fantastic weekend, and Pam and I are looking forward to seeing everyone!.
-
 My newest photo release, "On Another World". This was taken during one of my Sunset Photography Workshops in the Sh… https://t.co/m0azZXzMUO
 -
California Beautiful Thank you for following me!!
5 Reason Why Your Photos Suck
We’ve all been in there. You like a photo that you took, but it’s not getting the reaction on social media that you thought it would. Why? Is it that they don’t know a good photo when they see one? I mean this thing belongs in a gallery!!!
Well....cupcake...perhaps your photo sucks.
I am the first person to stand on a soapbox and say that social media has become the worst enemy for photography simply because even the worst photos get likes and loves. Really? Trust me, if you have friends you could put up a photo with someone’s head half cut off and the photo off weight and you’ll still get likes. So how does a photo not get likes if that is the case? Well here are 5 things that you can look at to determine if your photo sucks. Feel free to use this as a guide for looking at other photos as well 😊
Reason 1 - Bad Lighting
Lighting is one of two critical components to a photo, so it goes without saying that it could easily be a contributing factor to suckage. Is the subject dark? Is the subject too bright? Are there weird and distracting shadows? All great things to think about when shooting.
Reason 2 - Shooting at the wrong time of day
This ties in to Reason 1 above, but when are you shooting your outdoor photos? If you say in the middle of the day then you are shooting in bad light (unless it is cloudy). A clear blue sky during mid day will give you the worst light of the day. Over exposed highlights and far too dark shadows because the sun’s light is so intense. The contrast kills you. How many portrait sessions have you had where the photographer chooses 1pm on Saturday? Hmmm. Why not go have a picnic or a walk and come back a few hours later when the sun is going down and the light is much much better.
Reason 3 - Too much Photoshop
Photoshop is a tool, just like your camera and lens. It can be used too much however. A good photo, unless you are doing compositions, will have very minimal, and hardly noticeable edits to it. Slight sharpness tweak, slight vignette, maybe a tiny white balance correction. They don’t take away from the photo you took, but enhance it a bit.
Addition-faking a blurred background by using the blur tool in Photoshop looks horrible and is very easy to notice. If you don’t know how to do it in the camera then learn it (see Reason 4 below)
Reason 4 - You’re trying to impress others
You feel great because you got 25 likes and a comment that you are an amazing photographer on your first photo posting on Facebook. Now it’s go time. So instead of staying within your skill level you decide to go for the gusto and hit the high and hard stuff. You are a great photographer, remember, you can do anything. Let’s charge money, let’s offer every type of service, etc. etc.
This choice will more than likely kill your photos. Everyone is learning at photography, no matter what skill level you are at. I always recommend getting good where you are at before moving up a notch in the difficulty scale. A good rule of thumb is if you don’t know how hard a type of shot is then you are not ready for it. Research research research. Do your homework. Definitely challenge yourself but arm yourself with everything that you can beforehand.
Reason 5 - blur or out of focus
With the extremely advanced cameras that we have today, it is extremely painful to see a photo posted of something blurry (if it wasn’t intended to be). A sharp photo brings in people’s attention. Maybe you were out of focus, maybe it’s motion blur, either way don’t post it because it sucks!
These are just a handful of a thousand reasons why your photos might suck. Take a closer look, not just your photos, but those posted by others as well. Can you see some of the things that I point out? I bet so.
If if you have any questions about your photos, need a critique, whatever, shoot me a message. I am happy to help.
You may want to look into attending one of my Photo101 classes as well. I teach lighting and composition to help you take far better photos, with any type of camera. I have classes registering right now! Just check out my Classes section.
Take care, have fun, enjoy photos.
Scott
Total Eclipse 2017 from KY

Solar Eclipse 2017 by Scott Turnmeyer
The entire country knew that there would be a solar eclipse on Aug. 21. When I first found out, all that I could think about was getting shots of totality, especially since I never had seen anything but a partial before. It was time to research.
As I looked at all of the information, it was clear that the best place to be was Western Kentucky, IF the weather was good. Hopkinsville, KY to be exact, the spot with the longest amount of totality, a whopping 2 min and 40 seconds.
As luck would have it, Pam has family in Owensboro, KY, roughly 80 miles north of the most sought after spot on the planet for this event. We had been wanting to visit anyway, so a gracious invite from family had our plans set. Arrive Saturday, enjoy family. Head down Monday for the eclipse, back up to Owensboro, then the 9.5 hour trek back to Virginia on Tuesday. Done!
Trip down was easy enough as a 9.5 hour drive could be. We arrived morning, and not long after I was already researching and planning for Monday. I spent quite a bit of Saturday, and most of Sunday checking weather forecasts, cloud patterns, crowd predictions, and so much more. I knew Hopkinsville was going to get inundated with people, the local news was estimating near 150,000, so we really didn't want to be in the middle of that. So I wanted to find a place as near to the center line as possible so that we'd have more time in totality for photos, but to the north so it would be less distance back through traffic to Owensboro, but not too crowded. We'll finally late Sunday afternoon the decision was made to hit quiet little Crofton, KY, about 10 miles north of Hopkinsville. There were having an event in their park, bathroom facilities, food for only $20. Okay, sign us up.
We left Owensboro Monday morning around 6amexpecting our 1hr drive to take about 3x that. Surprisingly it didn't. There was little to no traffic, so apparently everyone was already there or coming down later.

Just arrived!!
We we showed up as one of the first cars there, gave our name for the reservation, paid our fee and found a nice spot in the middle of their field to setup shop. We setup our 10x10 canopy right at the back of the car, then we relaxed some as we had 4 hours until the moon would begin making its way across the face of the sun.
With about an hour left until the eclipse started, I began setting up the equipment. I had (3) cameras, (2) telephoto lenses, telescope and a solar filter. I had my Canon 7D with my 70-200 2.8, Pam’s Sony a5000 usin my Meade ETX 125 as a 1900mm lens, and my Sony a6300 locked onto my Canon 100-400mm 3.5-5.6. The solar filter would work on either of my telephoto lenses so I started on the 100-400 as my test shots the day before showed that 400mm was pretty good, even giving up the detail of sunspots. So let’s start there. I had all (3) on tripods.

Setup and Ready!

Our weather that day was absolutely perfect. A mostly cloudless sky, about 90 degrees for a high but you didn’t feel it because there was a nice easy breeze all day keeping it tolerable.
As 11:30am CT came around you could see the energy in the field begin to rise. People were getting their Eclipse glasses on, cameras set, etc. the countdown to 11:56am had started.

It was a great crowd though. We had plenty of room and people on both sides of us were super nice. Everyone was in a great mood.
I knew that besides the shot of the corona during totality, there were 2 others specific photos that I wanted to go after. The first was the difficult to get Diamond Ring, and the second was a progression composite of the entire event, from the point the moon first starts across the sun, through totality and all the way to the moon coming off of the sun.
The diamond ring was going to be tough, but I knew that would have to be shot without a solar filter at just the right moment, so I had time to prepare for that.
The progression composite I decided to go with the Sony a6300 with the 100-400 Canon lens. Canon lens you ask? Yes, I have always shot Canon but moved into the Sony arena last year with my favorite little tool the Metabonz adapter. It allows me to shoot Canon glass on my Sony. LOVE it. Has one little drawback with autofocus tracking, but I am confident that might be fixed in a firmware update soon. Everything else is right on point.

Eclipse starting as the moon begins to cover the sun.
So I begin by getting a bracket of exposures right as the moon started, then set my alarm on my Apple Watch to remind me in 5 minutes. I would do the same thing every 5 minutes throughout the entire event to give me the shots for the composite. Of course, I'm shooting at the sun before and after totality, so I was using a solar filter on the 100-300mm lens.
As the moon crossed the sun I was shooting on a tripod and popped out the Sony LCD do I didn't have to crank my neck to look through the viewfinder. Awesome option there. I was shooting at ISO 100, 400mm, f/5.6 and 1/1000 shutter speed. I decided to bracket my shots every 5 minutes by adjusting the shutter speed only, so I would take 1 at 1/1000, 1 at 1/750, 1 at 1/500 and 1 at 1/1500. I ended up liking the 1/1000 the best.
As the time to totality decreased, I'd say things go really interesting at the point where the sun was a smaller crescent than you would see from the moon. Things were really close then. I now moved on to getting a shot every 15 seconds, and was using my self timer on the Sony to make sure there was no camera shake. I should have any as my shutter speeds were high enough, but I knew that to get the diamond ring I needed to take off the solar filter and then the shutter speeds was going to have to come down significantly. Needed to be prepared.
Unfortunately as you read this, I can tell you all day long about how amazing totality is, but you will never truly get it unless you see it. It's different than anything you've ever seen before, and watching it online is NOTHING compared to the real thing.
I'm busy snapping away as the moon begins to get to the last bit of the sun. The energy in the field where we were was growing exponentially. I looked up at the sun and even though a small amount was showing you still could not look at it without turning away. Amazing. At this point I decided it was time to take the solar filter off because I wanted that diamond ring. As soon as I took the filter off I had to speed up the camera as now it was getting a TON of light. My shutter speeds quickly went to 1/3000 to compensate. This is another benefit of the Sony a6300. Being able to adjust your settings and actually see what you are going to get before you snap the photo is so valuable. Especially when seconds count, as I would soon find out.

Minutes away from totality
I was sitting at 1/3000 because I was still getting the last curvature of the sun and these shots were part of the composite. I watched closely in the LCD as I shot waiting for the moment to drop my shutter speed for the diamond ring. Why would I do that? Well the diamond ring is the last little sliver of light from the sun and you are starting to see the corona around the moon. So if you have your exposure spot on then you will get a ring of corona and a superbright shot of that last sliver of the sun. Looks like a diamond ring.

The Diamond Ring. Notice the red on the right side of the corona.
When I felt like the time was right I dropped the shutter speed down to 1/1500 and snapped as quickly as I could. It worked. Shot 1 of three that I was going for was accomplished.
Now totality was seconds away. The energy in the field was crazy. It was getting very dark outside. Street lights were coming on, and then it happened. The sun was finally fully covered and the entire crowd all gasped at one time as the corona light up like someone hit a switch from around the moon. There was yelling and cheering, crickets were chirping. My wife and daughter could not believe their eyes, and neither could I.
Once totality started I had planned on going back and forth between my Sony with the 100-400 and the Sony a5000 on my Meade telescope. Well that didn't happen. I made the judgement call to stick with the 100-400 through the entire thing as it was happening fast and this was working just fine. If it ain't broke, don't fix it. I pulled back on the lens some so I could get more field of view. I didn't know how much corona I'd get, and I knew there were a few stars showing up nearby that I'd love to get in a shot or two. I pulled back from 400mm to 260mm and dropped the shutter speed down to 1/90. YES, that is right. I went from 1/1500 with just a speck of the sun showing to 1/90 in about 2 seconds. It got that dark. When I did, what I saw in the LCD made me emotional. There it was, a 100% total eclipse and the corona was glowing around it. Shot 2 is now accomplished.
People were still yelling and cheering, my wife was smiling and just amazed, my daughter jumped on her phone and started taking a Youtube-ish selfie video of herself in the experience, I'll see if I can add that that to this blog. She did really well with it.
I'm now shooting totality and still varying my shutter speeds some to get different aspects of the event. Shots with 1/90 shutter speed were not showing the brightness of the corona as much, and this allowed me to actually seen in the LCD, and the photos, the red on the surface of the sun showing around the moon. It was like fire. AMAZING. When I wanted to bright corona to return I'd drop the shutter speed down to 1/15 and kept varying through to make sure I took a gammit of shots. I can tell you right now that 2min and 33seconds isn't long at all. LOL
So about mid way through I stopped shooting. I looked up instead of at my LCD. Why? Simple. I have taken a ton of event photos and this one I was not going to pass up experiencing it as well as photographing it. It felt amazing. I was awe inspiring. It was one of the most beautiful things I've ever seen in my life. It was so strong, so powerful. It put life into a bit more perspective, and showed how small we really are. I was EXTREMELY emotional, and seeing the reactions of my wife and daughter made it even more so.
But now it was time to get back to business as I knew the sun would be showing back up in a few seconds. If didn't let me down as suddenly the world got lighter again. I basically got the other diamond ring shot then put the filter back on the camera and followed my exact sequence into totality but in reverse order.

As people packed up and headed out, we waited the next hour and a half to get those shots every 5 minutes for my composite. Finally it was time and the last little bit of the moon was about to move off of the sun. I should have the shots to make Shot 3 an accomplishment. I've got 300 photos on the card and will transfer them to my laptop (so I will have the photos in 2 places) as soon as I am back.
We left, turned on Waze to head back to Owensboro, and drove the next hour and 20 minutes back talking about the experience the entire time. Oh, yes, the interstate was a parking lot, but its why I use Waze. It kept routing us around the traffic and we were back in no time. No traffic for us :)
That evening we had a great dinner, and packed up for our trip home the next morning.
This trip was absolutely amazing. In my 45 years I had never seen a live total eclipse, and I kick myself for not making that happen. We are now hooked, and are planning on hitting as many as possible. Not just for photos, but more for the experience, the joy, the adrenaline, the emotion, the ENERGY. Please do yourself a favor, make the opportunity to see one with people you love. Don't skimp out and not see a 100% total. There is another one in 7 years here in the US. See it. I guarantee you we will.
Thanks for reading. I hope you enjoyed it. The photos you see here, and others, will be released as an Eclipse17 collection in the Fine Art this weekend. I'll be running a special on the entire collection for that first weekend. I hope you like what you see.

Shot 1 - The Diamond Ring - Accomplished

Shot 2 - Totality - Accomplished

Shot 3 - Composite of the entire eclipse progression - Accomplished
4 New Workshop Dates Announced and Open for Registration
Scott announced yesterday 4 brand new workshops that are now open for registration.
Sunset Photo Workshop in the Shenandoah National Park

Sunset Photo Workshop in the Shenandoah National Park will allow individuals to visit this beautiful park with Scott, setup in a location picked by Scott and then get some great sunset photos while Scott is there to assist. Two dates for this workshop.
Friday, June 30, 2017 - Special pricing is 50% off as this is the first Sunset Workshop. Cost is $25
Friday, July 28, 2017 - Cost is $25
Sunrise Photo Workshop in the Shenandoah National Park

Sunrise Photo Workshop in the Shenandoah National Park will allow individuals to visit this beautiful park with Scott, setup in a location picked by Scott and then get some stunning sunrise photos while Scott is there to assist. Two dates for this workshop.
Saturday, July 1, 2017 - Special pricing is 50% off as this is the first Sunset Workshop. Cost is $25
Friday, July 28, 2017 - Cost is $25

Photo Assignment for 5/13/17 - See The Light

This week's photo Assignment is about light. It's supposed to be sunny this week, so get out there and use that light. I'd like to see different photos where light is used differently. Could be sunset, sunrise, reflecting off water, windows, whatever you think. Please post your photos as comments on the Facebook post. Comments as I'll critique next weekend. Ends next Sat at 11:59pm and critiques will be Sunday the 21st.

Photo 301 Class Registering - Shooting Motion, Low Light and More
Now register for Scott's Photo 301 class.
@The Studio in Front Royal
This is for anyone who has a camera with the ability to shoot in manual mode and has the understanding of how to set aperture, shutter speed and ISO on their camera (My Photo 201 and Taking Better Photos - Lighting and Composition classes will prep you for this class)
This class is geared for anyone who wants to take their photography to the next level. If you have learned what aperture, shutter speed and ISO are, its now time to take them to the next level. Learn how to shoot:
- Motion - We'll talk about many different motion scenarios from wildlife to sports to landscapes (cotton candy waterfalls to be exact). I'll discuss many tips and techniques that I have used over the years and what tools will help you in most situations. You'll learn how to stop action, slow it down, and create advanced photos that actually show motion.
- Depth - Learn to use depth of field in your photos, especially portraits, to take those boring photos to the professional level. Don't blur the edges of a photo in post processing, get a true natural blur in camera.
- Low Light - Here is the evil of most photographers. How do I shoot in low light conditions. We'll discuss the topic at length, go into examples of settings in conditions, tool and techniques that I use, and more.
- Lens and accessory recommendations and buying tips And much more There will be up to 3hr class time Light snacks provided. Class is rain or shine. Full refund given if canceled more than 7 days prior to class. If less than 7 days no refund returned unless your spot is filled. By purchasing this class you agree to this cancellation policy.
View the class in our events below or register HERE.
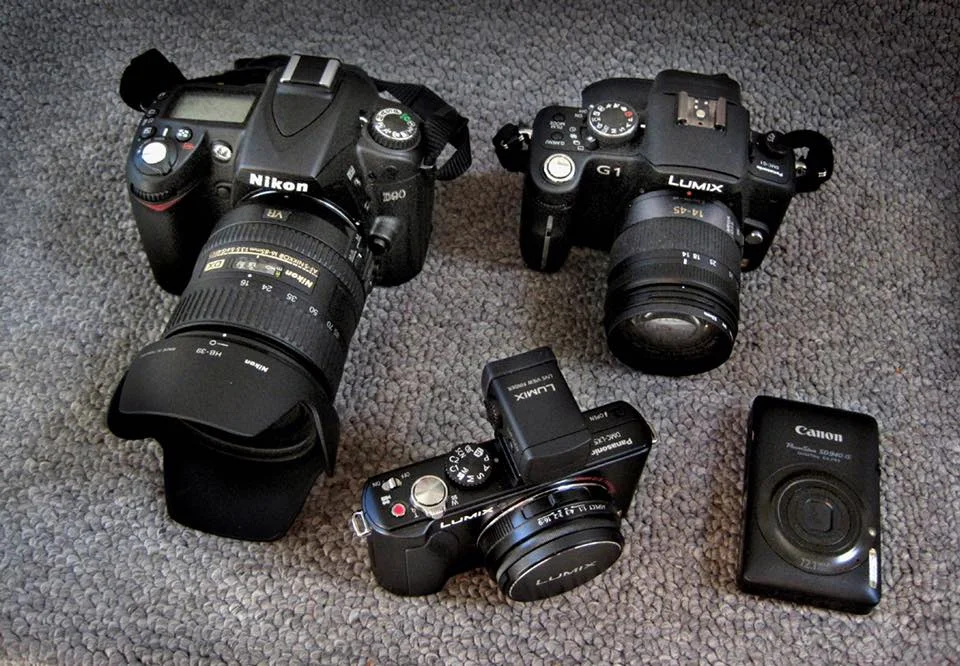

Photo Assignment 4/5 - Color
Hi everyone,
This week's photo assignment will help you focusing in on your surroundings as well as working to make something your focal point of your photo. This assignment can be shot with any style camera, even your phone.
This week I want you to focus on COLOR. Pick a single color and go around shooting things that are that color in your photos. Remember, make it the focal point. Draw attention to that color.
By Tuesday evening at 10pm, please post your best 2 photos as a comment to the assignment post on the Facebook page. I'll critique them all.
I'm now putting the weekly photo assignments on my blog, as well as the Facebook page. But please finish the assignment by posting your photos to the Facebook page.
Try Before You Buy!
We all know that photography equipment is quite expensive, especially when you are moving into purchasing the pro grade lenses and cameras. Many people, including myself, has hesitation in spending $2000 on a piece of equipment when you aren't really sure whether its right for you, or you'll use it as much as you thought you would. What do I do?
I Try Before I Buy!
There are two websites out there that I use whenever I want to try out a piece of equipment before I pull the trigger on purchasing. Or sometimes I need this special lens for a one time shoot, so it doesn't make sense for me to purchase it for that one time. They are rental websites that allow you to rent all of the major camera manufacturers, lenses, accessories, etc. You name it, chances are they have it.
I am sure there are many options out there these days, but my preferred sites are:

Borrowlenses.com Website
1. Borrowlenses.com
Borrowlenses has camera video and a section where you can purchased used gear as they move them through their lifecycle. I have never purchased equipment, but have rented cameras and lenses many times.
Their rental process is very intuitive and can all be done on their website. Pick your equipment, choose the day you want it to arrive, choose the day you want to return it, choose whether you want equipment insurance (I recommend), enter your payment and shipping details and you are done.
The equipment comes packaged safely in a box ready to return, along with the return shipping label. So easy to use.
2. Lensrentals.com
Like Borrowlenses, Lensrentals has video and camera equipment. They not only sell used equipment, but they now have a Keeper option of renting some equipment and that rental price is put towards your purchase of that equipment. I haven't done this myself, but seems like a good option.

Lensrentals.com Website
The rental process for Lensrentals closely resembles that of the site above. Very easy and intuitive. Very quick and seamless shipping and receiving.
The equipment from Lensrentals also is packed fantastically, along with a return shipping labe. So when you are done and need to send it back, put the equipment back in the box as it was, seal it up, label it and drop it off at a location. Easy as pie.
So give it a try. Its a service from both sites that I have used many times and not one time have had an issue.
Scott